Ceiling Fans Raise The Comfort

Ceiling Fan Buying Guide

Can I install a ceiling fan? – Ceiling Height

If your ceiling is 2.4m or higher then you can typically install a fan that will conform with Australian standards. The standard is to have the blades at a 2.1m height, this is in fact a requirement in many states. You can check the ceiling fan drop (from ceiling to blade) to ensure a fan is suitable for your ceiling height.

High Ceilings

For high ceilings it may be necessary for you to have a longer drop on the fan to ensure it sits at a more optimal height for air movement. Most fans can be purchased with an extension rod as an accessory. This extension rod will typically replace the standard downrod on the fan making the drop greater.

Extension rods are typically available in 90cm lengths. The majority can be cut to size to ensure that the ceiling fan sits at the height that you require. Some manufacturers also produce extension rods in 180cm lengths for exceptionally high ceilings. If a ceiling fan can be used with an extension rod it will be listed as an accessory below the fan listing. Please bear in mind that the above is a guide only – the actual height that the ceiling fan sits is down to you, however airflow will be optimal if the blades are somewhere between 2.1m and 2.5m from the floor.

Low Ceilings

For low ceilings (generally 2.4m or less) we have a category specifically for low profile ceiling fans. These fans are also commonly referred to as ‘hugger’ fans due to the fact that they hug closely to the ceiling. Fans within this category have a lower than standard (30cm) drop from ceiling to blade. For specific details take a look at each individual fan listing within this category, as the drop will vary from model to model.

Which Size Ceiling Fan?

How to select the correct size fan based on your room size

Firstly, all ceiling fans are measured in inches and this measurement relates to the diameter (blade span) of the fan. For example a 48″ fan will measure 48 inches from one blade tip to the opposite tip. A bigger blade diameter means the fan will cover a larger area, it does not necessarily equate to higher power. The most common sizes for bedrooms are 48″ and 52″fans. For a lounge r living area, 52″ and 56″ fans are common. Obviously this will vary depending on the actual size of the room. For very small rooms you may wish to take a look at our small fans category. For big living spaces we also have a category for large ceiling fans.

Ceiling Fan Installation / Selection Guide

INSTALLATION OF ONE UNIT CEILING FAN

The main features of a ceiling fan is to move the entire air in the room, not creating a local wind as in other fans.

To determine the model and mounting position, consider the condition below

H : distance from blade to floor (m)

R : radius of effective floor space of wind spread (m)

S : effective floor area (m2)

Calculation Formula :

R : coefficient x H

S : hR2 , where h = 3.14

L : Distance between Ceiling Fan to another (pitch in M)

A : Distance of overlapping air throw between fan

B : Distance between tip of fan to wall

BL : Blade length (M)

L : (RX2) – 0.4, where 0.4 is maximum allowable overlapping of air throw between fan

L : (RX2) – 0, if minimum A = 0

To calculate B = R – BL

How-To: Our Ceiling Fan Buying Guide

Downrod length? Ceiling pitch calculations? Airflow efficiency? Purchasing the right ceiling fan can be difficult if you don’t have information on your side. Luckily for you, we’re here to help. Read on to learn everything you need to know to equip your space with a beautiful new ceiling fan

Moisture Ratings: Wet Vs. Damp Vs. Dry

Moisture and electronics don’t usually get along, so if your ceiling fan is going to be exposed to the elements, you’ll want to make sure it’s designed to handle them. Our ceiling fans come rated for use in wet environments (areas with where the ceiling provides the only protection from the elements) damp environments (areas that are exposed to full changes in humidity and possibly condensation, such as covered porches) and dry environments (indoors). Wet-rated and damp-rated ceiling fans can be used in dry environments, but dry-rated ceiling fans can only be used in dry environments.

Q: Do your fans come with lights?

A: Most but not all of our fans come with LED light kits. Check the “Details” tab on the product page to see which fans do or do not.

The Golden Ratio: Room Size, Air Flow, and Fan Scale

When choosing the size of fan you need, your primary concern should be for how much air the fan can move. An undersized ceiling fan simply won’t do the job, especially if you rely on your ceiling fan on a regular basis. If you’re more technically inclined, you can check out the spec sheet for each fan model to view how much airflow output is required for a given size of room.

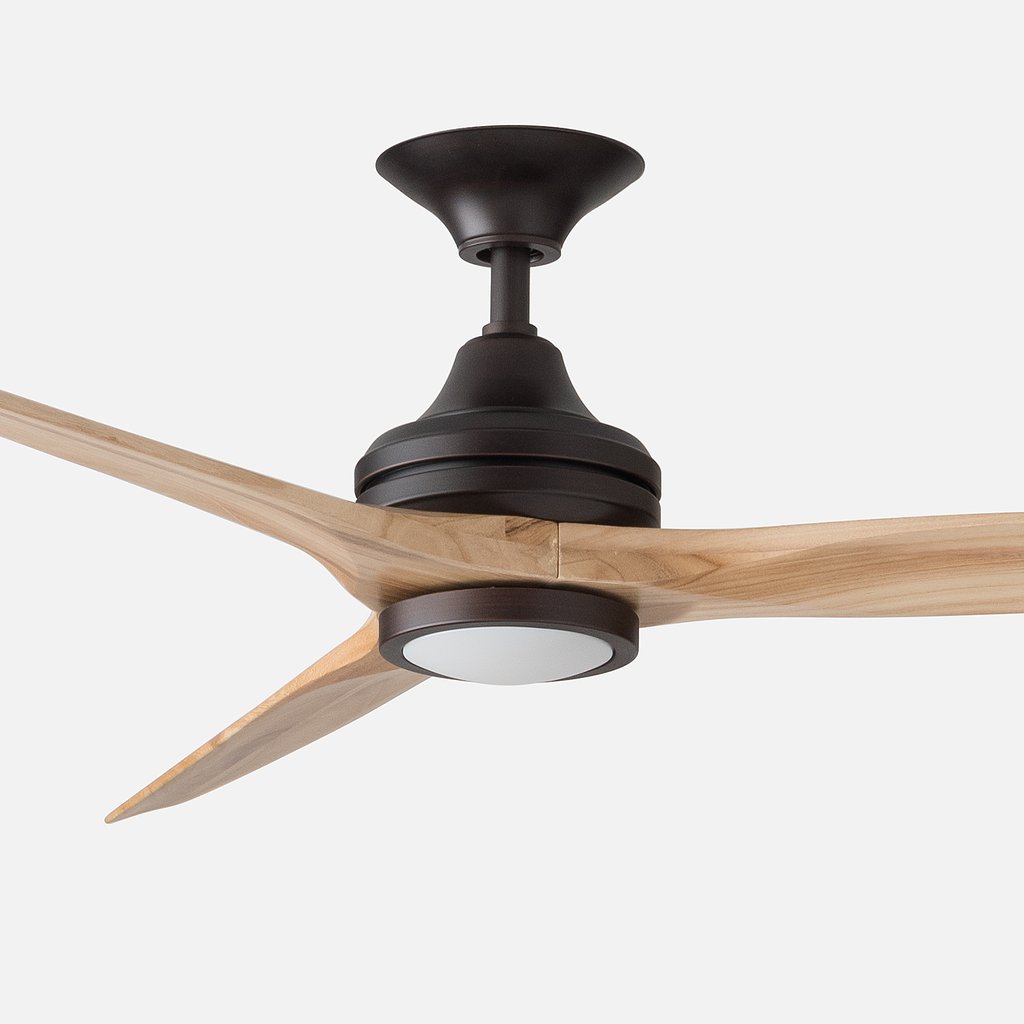
Once you’ve chosen a fan that can be effective in your space, you can start choosing fans for scale. Choosing the smallest necessary fan for your room will give a more traditional and discrete look to the fan installation while a large-format fan can function as a statement piece.

Installing a Ceiling Fan

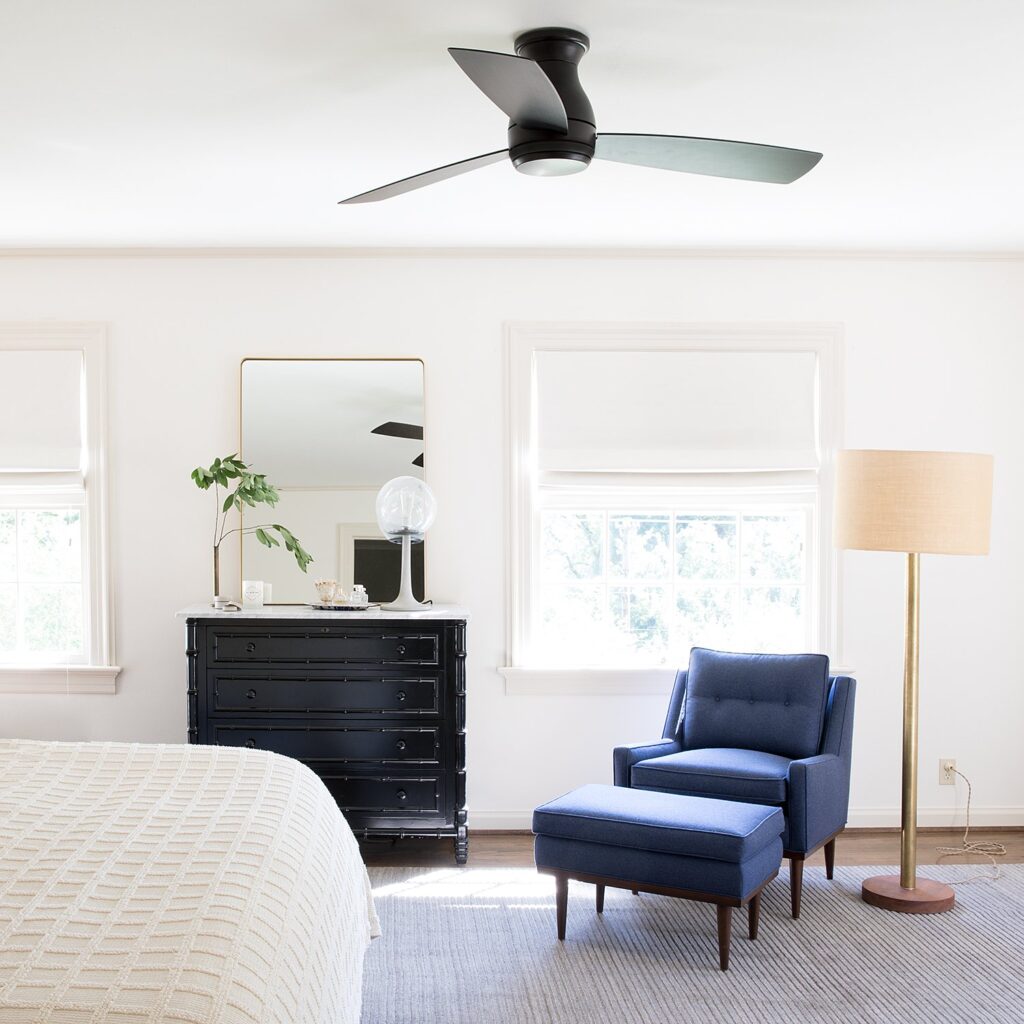
A ceiling fan can add an interesting decorative touch to a room and will also make the room have a much more comfortable and even temperature. Ceiling fans well placed can increase the efficiency of air conditioners and furnaces because they very quietly mix the warmer air which rises near the ceiling with cooler air that settles near the floor.

Ceiling fan blades generally span a diameter of 36, 42, or 48 inches. You should choose the size that is best for the size of the room in which it is installed. A 48 inch fan spread may look best in a large room and one of that size may be needed to adequately circulate the air. Likewise, a smaller diameter fan spread will work nicely in a smaller sized room. Ceiling fans generally have either 4 or 5 fan blades.

The motor is equipped with a switch that will reverse the direction of rotation of the fan thus blowing air downward or pulling it upward. Pulling the air upward during the colder months pulls the warmer air up and across the ceiling and down the walls to more uniformly distribute the warm air. The downward flow of air is usually done during the warmer months to move the air over people in the room making them feel cooler.

Ceiling fans can also have a light kit added to them as part of the installation. There are several configurations of the light fixture to accommodate differing decorative tastes. The ceiling fan and lights can be operated from a wall switch, by pull chains on the fan housing, or with a remote control.

Ceiling fans can just as easily be installed by persons with limited or no vision as by persons who have good vision by having the right tools and following the five steps described below.

Tools you may need

Straight and philips screw drivers

Pliers that incorporate a wire cutter, sometimes referred to as linemen’s pliers

Needle nose pliers

Wire stripper or sharp knife for stripping insulation from the electrical wire

Allen wrenches for some models, (sometime provided by the manufacturer)

Sturdy ladder or strong tall step stool

Ceiling fan installation prices

Although basic ceiling fans can be relatively cheap to purchase, intallation must be carried out by a qualified electrician to proper standards. Eletricians charge an average rate of $77/hr for ceiling fan installation. The price, however, can go down to $69/hr if the job is pretty straightforward. Complicated installations, on the other hand, can go up to $80/hr. On average, ceiling fan installation jobs cost between $200 – $400. The cost per fan install can be redueced if multiple fans are being installed at one time.

Factors that can affect the cost of ceiling fan installation

Installing ceiling fans is typically a straightforward type of work. However, because the tasks and circumstances vary from job to job, the price of the service changes as well. Here are some things that can influence the cost of a ceiling fan installation service

Number of ceiling fans

It’s common for businesses to charge per fan, so you can expect to pay a higher rate if you have a couple or more ceiling fans to be installed. If you have old fans that need to be removed, this can incur additional fees too.

Controls

Remote-controlled ceiling fans are generally easier to use and install. However, if you prefer to have a wall switch for your fan, rewiring may be needed. This can make the installation a bit difficult to carry out, thus increasing the cost.

Other circumstances

New or additional wiring is sometimes needed for ceiling fans to be installed. Electricians can charge extra for these especially if complicated issues suddenly arise. The height of the ceiling is a factor too as it will determine the ease or difficulty of accessing the area.

Why you should hire a professional to install your ceiling fan

Safety should be enough reason for you to book the services of a licensed tradie. This is to ensure that your ceiling fan will be installed properly. If you’re converting a light switch to a wall switch, this can make the job more complicated. This will definitely require the expertise of a sparkie.

Various Types Of Outdoor Electrical Lighting

Solar Landscape Lighting (Pros and Cons)

Outdoor lighting is an essential part of landscape design and something that every home needs. Landscape lighting increases safety, enhances your home security measures, guides traffic through your yard, accentuates interesting features of your home or yard, provides task lighting and illuminates your outdoor living areas.

So, really, the only question is which type of outdoor lighting is right for you. The three basic categories are solar, halogen and LED. Here, we will look at the pros and cons of solar landscape lights, but be sure to also read Halogen vs LED Landscape Lighting to help you determine the right lighting product to best suit your needs.

Benefits of Solar Landscaping Lighting

First, let’s take a look at some of the pros of choosing solar-powered landscape lighting for your patios, walkways, driveway, flowerbeds or garden.

  • You don’t need a nearby source (or any source) of electricity for your lights.
  • Because you do not need electricity, you can place your landscape lights almost anywhere that receives adequate sunlight throughout the day.
  • Your landscape lighting will not increase your electricity bill.
  • In the summer months when the days are longer, your lights will stay on longer into the night, which may be a benefit during this popular season for entertaining.
  • You can install your lights in a flowerbed or vegetable garden where you frequently dig without worrying about damaging electrical wires.
  • Because no wiring is required, solar landscape lights are easy to install and can be a do-it-yourself project.
  • Other than your upfront investment, you can expect to spend little to no money during the lifetime of your solar lights. This is because they do not require electricity and have minimal maintenance needs.
  • Because they do not require electricity, solar yard lights are an eco-friendly choice that can help lower your home’s carbon footprint.
  • You do not have to worry about your children or dogs cutting, chewing through or tripping on electrical wires.

Cons of Solar Landscape Lighting

Now that we have gone over the potential benefits of choosing solar landscape lights, let’s look at some of the cons of solar lighting to help you determine if this is the right type of yard lights for you.

  • Solar landscape lights must be placed where they will receive light throughout the day to charge the batteries.
  • Solar landscape lighting is generally not a viable option in areas with trees, shrubs, bushes, plants that block the sun.
  • Solar lights often cannot be used near structures that block the sun for a significant part of the day.
  • The solar panels must be cleaned regularly to remove dust and debris that can block the sunlight needed to charge the batteries.
  • Most solar lights will not stay on as long as other landscape lighting options after nightfall on cloudy days due to not receiving enough sunlight to charge the batteries fully.

Questions about Solar Lighting:

How does outdoor solar lighting work?

Solar-powered lights each contain a solar cell, Ni-Cad rechargeable battery, LED light and photoresistor. Essentially, each light’s solar cell produces energy, which charges the battery during the day. Solar-powered lights stop producing energy at night, so the photoresistor, which detects the absence of light, activates the battery, which turns the LED light on.

What are the benefits of outdoor solar lighting?

Simple installation is the best reason to choose them. They don’t require any wiring or other power sources, making it easy to place them in the ground. You’ll also be grateful when your power bill comes since these lights aren’t using electricity. Safety is another reason to choose solar lights. Since they don’t use power cords or electricity, they are safe for use near ponds or swimming pools.

How long does outdoor solar lighting last?

The Ni-Cad rechargeable batteries will last about two years if you take care of them and periodically allow your lights to recharge. Replacement batteries can also be ordered from the manufacturer or online. The LED light bulbs will run up to 100,000 hours each and are not replaceable.

How do I take care of my outdoor solar lighting?

Because solar lights are powered by direct sunlight, they need to be cleaned periodically from dust or mud, so they can easily store energy for the night. They also do not work as well during the winter or on cloudy days, so you may want to store your them indoors during rainy or snowy seasons. Switch them to the off position when they are not being used and store them in a dark place.

Is outdoor solar lighting weatherproof?

While solar lights are designed for all temperatures, the models that include glass should not be left outdoors if you receive a lot of rain or snow. They should not be exposed to windstorms or extreme storms, either, as they can easily be damaged. You can buy hanging fixtures if you’re worried about your lights blowing away; hanging lights also work well for lining swimming pools, ponds and creeks.

Things To Do If Your Solar Powered Lights Aren’t Working

Now we are big fans of solar lights, but we do understand that they can cause some people a lot of issues. If you’re struggling with yours then try out a couple of our handy tips to see if you can get them working again.

1. Check that they’re turned on

You would be surprised how often people haven’t realised that their lights have an on/off switch (not all of them do).

2. Check that there’s not a pull tab on the battery

This will apply to newly purchased lights only. Sometimes there is a pull tab on the battery that needs to be removed before the light will function. If your new light doesn’t work, definitely check on this.

3. Cover the panel to test the light

Generally speaking, solar powered lights do not work during the day. In order to test if the light is working, you will need to completely cover the solar panel to simulate darkness.

4. Ensure the solar panel is clean

A dirty panel can impact the amount of charge received. See our guide on how to clean your solar panel.

5. Make sure the solar panel is positioned correctly

The panel should be positioned to receive sunlight all (or at least most of the) day, or else it might not be receiving sufficient charge. Do solar lights need direct sunlight to work?

6. Test with regular batteries if possible

In most instances of solar powered lights not working, it is the batteries at fault. Either they are not receiving charge or they are not holding it. If the lights work using normal batteries then it is clear that the problem is with either the rechargeable batteries or the solar panel.

7. Switch off and leave to charge for 72 hours

Many solar powered lights will still charge if they are not turned on, and by turning them off you actually allow the battery to get a full charge over several days of sunlight. It is an idea to do this regularly with solar lights.

8. Contact the retailer

If all else fails, contact the retailer that your purchased your lights from. All of our lights have a 12 month warranty. So, if you’ve tried the above steps and bought your lights from us within the last 12 months contact us or view our full returns policy.

Can you Charge Solar Lights Without Sun?

Yes! It is certainly possible to charge solar lights (like these solar lanterns) without direct sunlight. There multiple methods to do this. Although they are not as efficient as bright sunlight would be in charging the battery, they will all work to regenerate the charge located in the battery and bring the solar light back to life in a pinch.

How to Charge Solar Lights Without Sun

1. In indirect sunlight

One might think that cloud cover is a death knell for solar-powered everything. One would be incorrect in that assumption. While direct, bright sunlight is the preferred way to regenerate a solar light battery, even indirect sunlight will work to charge the light. Remember when we said that photons knock the electrons off of the phosphorus-doped silicon atoms? That remains the case in indirect sunlight. There are just fewer photons to go around. In indirect sunlight, photons will still strike the solar panels, they will just do so less often and, therefore, charge the solar light battery slower than direct sunlight would.

2. Use artificial lighting

Artificial lighting, while much less powerful than sunlight, will charge a solar light battery. This means you can take the solar light inside and place it near an LED or incandescent bulb and expect the solar light batter to charge, albeit quite slowly. The same principle that keeps the battery charging during periods of indirect sunlight holds true in this case. The indoor lights that illuminate our rooms utilize photons just like the sun. They will also knock electrons loose from the silicon atoms in the solar panels.

We should note specifically that both LED and incandescent lights will operate to charge a solar light battery. You do not need to seek out one over the other. Either will do the trick.

3. Use the alternative charging method

Many solar lights, both indoor and outdoor, come with alternate charging methods. Frequently, these are USB or wall outlet ports that allow you to plug the solar light into a USB charger, computer or wall socket to charge the internal battery. Use the opportunity whenever it is convenient to fully charge the solar light (perhaps by using one of these solar power banks) by this method since it will typically be much faster than waiting for it to charge by solar panel, even in direct sunlight. Of course, if you purchased the solar light specifically to avoid using “on-the-grid” power solutions you may not wish to do this.

Tips to Prolong the Life of Your Solar Lights

Solar lights last, on average, about two years before the batteries must be replaced. However, there are a few ways to ensure they last a while longer.

  • Make sure to clean your solar lights regularly by wiping them with a clean cloth about every two weeks
  • Replace the batteries if the lights are unable to provide light for 8 hours
  • Turn lights off and store in a cool environment with some access to sunlight during extreme weather
  • Be cautious of placing lights in garden areas, as dirt buildup can prevent them from receiving adequate power

Make sure to turn lights off when they will not be exposed to light for long periods of time